17 December 2016

Liberty Bay, The day after we arrived in Poulsbo, the weather really picked up. It was a nice 20+ knot wind southerly. For having not anchored in the harbor in this kind of wind and never with the size of boat Northern is, it was a bit nerve racking. But after letting out some more anchor cable to increase the scope, she didn't drag at all. After that, I worried much less with every wind storm that came through. Even a day of 50+ knot gust didn't move her. 
Our new holding tank arrived... I had measured for one size tank and when I called to order they had a slightly bigger tank for decent enough amount cheaper to go for it. I thought it would squeeze in... Nope


It ended up being only a 1/2" to wide. Of course to follow the flow of a wood boat, that meant I had to cut more stuff out and of course that was going to take 4 times longer than I thought. It caused the death of my trusty Makita angle grinder. R.I.P. 

But a week later, it was in! It may look a little complicated, but its pretty simple. From all the work I have done on boats, the most recurring theme is to keep it simple. 

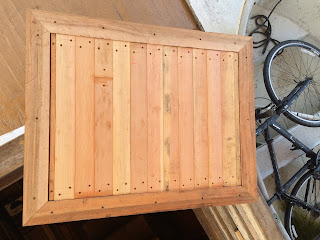
Since the original hatch cover for the aft hold had been cut up and cursed off the boat, I got to build a new one! Mahogany edge with vg fir in the middle. 

4 coats of varnish in.

The hatch cover frame for the top to sit on.


The beginning of constructing the head in the main hold where our living quarters will be. Two hot water heaters on the left (one for water and one for the heater floor in the master stateroom), a 32v freshwater pump on the right and a 110v water pump underneath. 

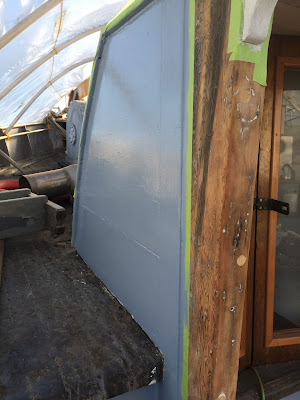
This bulkhead is not structural, so the framing is much less complicated.


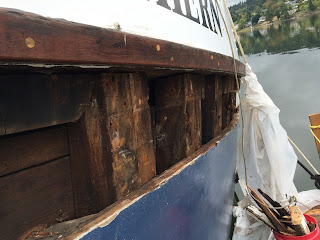
These planks had been removed when the previous owner had some new planks on the outside of the hull replaced before we purchased the boat. I finally got around to replacing them. The top plank came from a tree taken and milled from a friends property just 10 miles from the boat.

The T&G being put up in the head, toilet installed and working!

The big summer project, while at anchor mind you, was replacing the rotted top 3 planks on the port boat. Then stripping the forward half of the boat down to wood and finally getting some fresh paint on the old girl.


I like this picture, it really captures the look of wood well aged and worn after many decades of journeys. 


A common way to bed the anchor guard boards was to lather the area in tar and lay on a layer of tar felt cloth. It works well when the surfaces stay tight to one another, but on the area of the hull, its really difficult to have everything touching all the time. So where the cloth has disappeared is where the boards weren't secured very snuggly, wind, waves and time washed the tar and cloth away.  

Some plank ends needed to be refastened. The funny thing about old boats is, that sometime the only way to find out what needs attention is to start taking everything apart.


Before I removed the rotted planks, I made paper templates to use on the door skin material, which used to then make a template for the actual replacement planks-as seen in the below photo's.


Two planks in!

First coat of blue paint going on!

This the the door skin I used to make the template from the paper templet. I'm sure one doesn't need so many templates, but it is my first time doing planks, so lot of templates!


Here you can see the frames.

Transferring the paper template to the door skin template

After removing all the remaining old nails, I coated everything with red lead paint. Nice and toxic, but really works well!

Two of the new planks up close.


Rough cutting the new plank out of the giant slab of old growth fir.


All 3 planks are in, now time to hammer in the cotton and oakum to seal the seams, then prime and paint.

I sanded and put some sealer on the anchor guard wood to prepare for varnish.

Our progress after an extremely hot sunny day with a blow torch and sanders.

It's Blue!

16 May 2016

Gone with the tent, in with new paint!

After Kate nicely stripped all the old paint off and i removed some of the old wires and hoses, I did some caulking on the fwd break beam to prep for primer and paint. May not look like much, but  it took over 11 tubes of caulking.

First coat of primer. Even got it before midnight!


First coat of North Sea blue! Finally!


Cut out a walkway so the pups could finally hang out in the v-berth, and it's much more convenient for use too. Eventually there will be new doors there.


Added a dark blue stripe to the bases. 


And got the first coat of varnish on!

Yay for 40hr work weekends!